The Raised Bed Setup Guide No One Talks About (But Everyone Should)
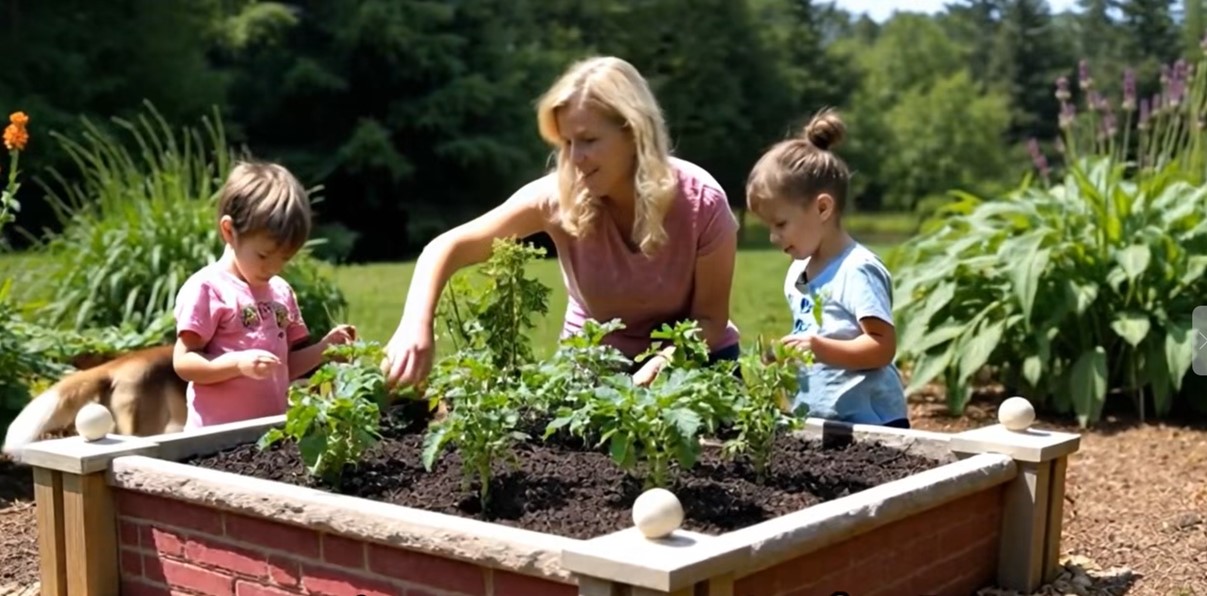
I've watched hundreds of gardeners invest in beautiful raised beds, fill them with soil, plant their vegetables, and then wonder why their tomatoes struggle while their neighbor's thrive.
The bed wasn't the problem.
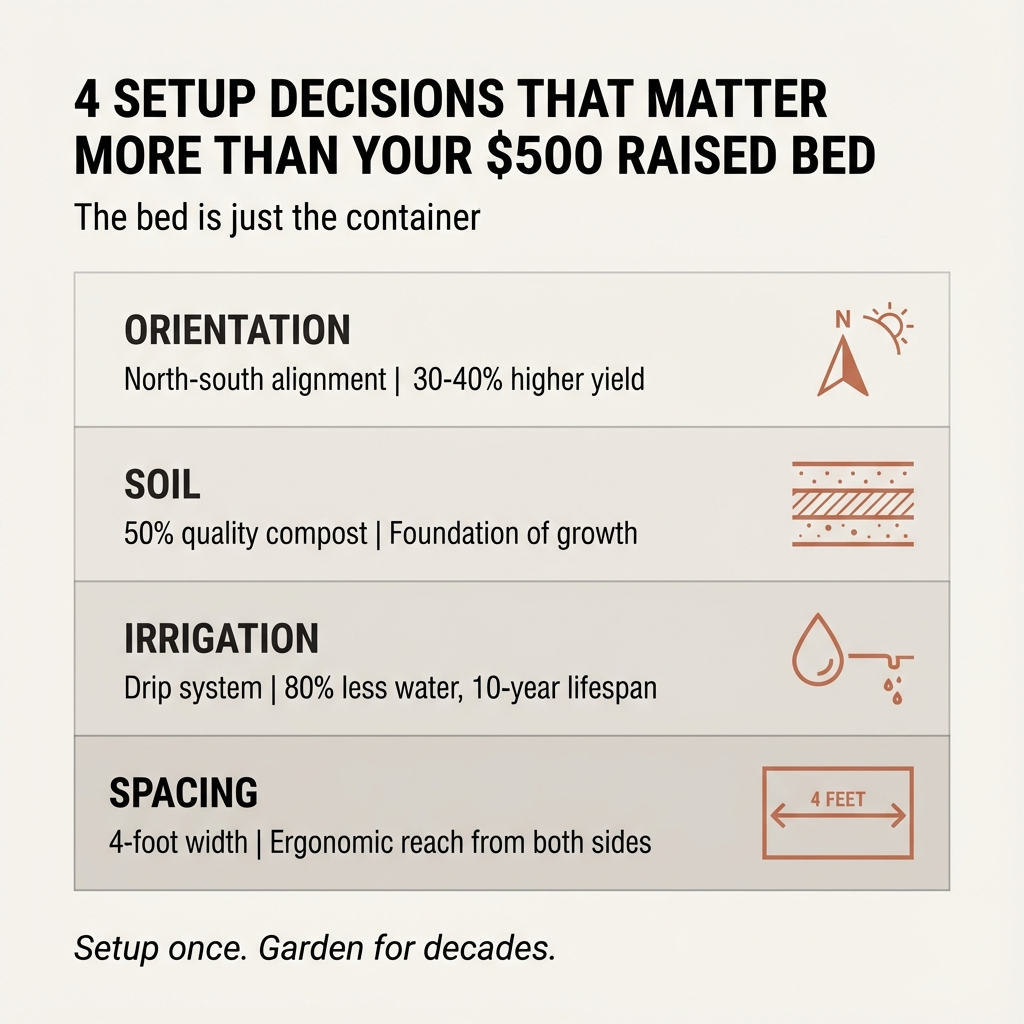
After three years testing GFRC raised garden systems and consulting with landscape architects, property managers, and DIY homeowners, I've learned something the gardening industry doesn't emphasize enough: your raised bed choice matters far less than the four foundational decisions you make during setup.
These decisions determine whether you're harvesting abundant vegetables or nursing struggling plants. They affect your water bills, your maintenance hours, and whether your garden still looks great in year ten.
Here's what actually matters.
Orientation: The Decision You Make Once That Affects Every Growing Season
Walk through any neighborhood with raised beds and you'll see them positioned randomly. Against the fence. Near the patio. Wherever they fit.
Most gardeners choose placement based on convenience or aesthetics.
Then they spend years fighting the consequences.
North-south orientation maximizes sunlight exposure throughout the day. Both sides of your bed receive equal amounts of morning and afternoon sun. Your plants grow uniformly instead of one side overshadowing the other.
The research backs this up clearly. When you plant rows east to west, the rows shade each other. Your overall productivity drops. Most vegetable plants need 6-8 hours of direct sunlight daily for optimal growth, and orientation directly impacts whether they get it.
I've seen the difference firsthand. Two identical beds, same soil mix, same plants. One oriented north-south, one east-west. The north-south bed consistently outperforms by 30-40% in yield.
Garden bed orientation can make the difference between a thriving garden and one that struggles to reach its potential.
Before you position your bed, check your sun patterns. Spend a day observing where shadows fall at 9am, noon, and 3pm. Note any structures or trees that block light. Then orient your bed to capture maximum sun exposure.
This single decision, made once, affects every plant you'll ever grow in that bed.
Soil Composition: Where Your Real Investment Goes
You can buy the most durable raised bed available. It can last 50 years.
But if you fill it with cheap soil, you'll fight problems every season.
I've tested this extensively. The difference between a properly formulated soil mix and bagged "garden soil" from big box stores is the difference between thriving plants and constant troubleshooting.
Here's what works:
The Foundation Formula
Equal parts topsoil, organic matter, and coarse sand. This creates light, well-draining soil that raised beds need.
But that's just the starting point.
About 50% of your raised bed composition should be quality organic compost. Not just any compost. You want a 4:1 ratio of browns (carbon) to greens (nitrogen). Ask your compost supplier what their mix contains. If they can't tell you, find a different supplier.
Research from Iowa State University Extension confirms this approach. Testing by experienced gardeners comparing three popular raised bed soil mixes found that tomatoes in raised beds generally outperform their ground soil counterparts when you use properly formulated mixes.
The "Perfect Soil Recipe" combining topsoil, diverse compost sources, and amendments showed better longevity because of the nutrients found in the soil and a more neutral pH.
One expert gardener reported that after perfecting their raised bed soil recipe over three years with 52 different crops, they "never had a failure."
The key insight: Building healthy growing medium doesn't mean buying lots of bags of garden soil. That approach gets expensive fast and won't provide robust growing medium. Instead, you construct proper soil with quality ingredients.
💡 Pro Tip: Calculate your soil volume before ordering. A 4x8 foot bed at 12 inches deep needs 32 cubic feet of soil. Order materials in bulk rather than bags. You'll save 40-60% and get better quality ingredients.
Irrigation Systems: The Math on What Actually Scales
Start with one raised bed and a watering can? That works fine.
Add three more beds? You're spending 20 minutes daily watering.
Scale to six beds? Now you're looking at irrigation systems.
I've installed both soaker hoses and drip irrigation across dozens of residential properties. The performance difference is substantial.
Soaker hoses work best for small gardens limited to one or two beds on level ground. They're inexpensive upfront. Easy to install. But they typically last only a few seasons before needing replacement due to wear and exposure to sunlight.
They're also prone to clogging.
Drip irrigation systems save up to 80% water compared to traditional watering methods. They're designed to last 10-15 years with proper care, though they can survive even longer.
The math matters here.
A quality drip system costs $200-400 upfront for a typical residential setup. Soaker hoses cost $50-100 but need replacement every 2-3 years. Over ten years, you'll spend more on soaker hoses while using significantly more water.
For raised bed gardens specifically, drip irrigation provides precision watering directly to plant roots using flexible tubing and pressure-compensating emitters. They're the top choice for large gardens, raised beds, and container gardens.
Drip emitter tubing resists clogging and is engineered to reduce dirt and debris build-up. It's built to withstand UV rays and chemical exposure. Soaker hoses degrade faster under the same conditions.
Add a smart irrigation timer and you can adjust watering based on weather data. This reduces water use by 30-40% compared to fixed schedules. Homeowners report smart timers have reduced water use by 35% compared to previous systems, saving roughly $100 annually on water bills.
The investment pays back in 3-4 years, then continues saving money and time for the next decade.
⚠️ Installation Note: Run your irrigation lines before filling beds with soil. Retrofitting irrigation into established beds means disturbing root systems and risking plant damage.
Spacing and Accessibility: The Ergonomics Everyone Ignores
You'll interact with your raised beds almost daily during growing season. Weeding, harvesting, pruning, checking for pests.
Poor spacing turns routine maintenance into physical strain.
The maximum width of a garden bed is a matter of human ergonomics. A garden bed should be no more than 4 feet wide if you access it from both sides. This width allows an adult to reach just past the center from any side, giving optimum accessibility to the gardening area.
If you access your garden beds from one side only, the optimum width is 2 feet.
I've seen property managers install beautiful 5-foot-wide beds against fences. They look impressive. But maintenance workers can't reach the back without stepping into the bed, compacting soil and damaging plants.
Pathways between raised beds need careful planning too.
Minimum pathway width: 18-24 inches for basic access. This works if you're just walking between beds.
Recommended width: 24-36 inches for larger or L-shaped beds. This allows easy movement for daily maintenance.
For wheelchair accessibility: Minimum 4 feet to ensure clearance for wheelchairs, walkers, and wheelbarrows.
The ideal wheelchair-accessible raised bed height is 24-30 inches. This lets someone seated reach comfortably across the bed without straining. Combined with 3-4 foot width, gardeners can easily reach into the middle with beds accessible from both sides.
These measurements aren't arbitrary. They're based on human reach, comfort, and sustainable maintenance practices.
Poor spacing doesn't just make maintenance harder. It makes you avoid maintenance. Weeds grow longer. Pests establish. Problems compound.
Plan your spacing before installation. Walk through the layout. Simulate reaching across beds. Push a wheelbarrow through pathways. Adjust before you commit.
The Real Math: Long-Term Durability Economics
Setup decisions affect your immediate growing season. Material choices affect the next decade.
I've tracked the total cost of ownership across different raised bed materials over ten years. The results challenge common assumptions about "affordable" options.
Wood raised beds: Pine or fir costs $100-200 upfront but rots within 3-5 years without proper seal. Cedar or redwood lasts longer but requires regular resealing. Factor in replacement costs, disposal, and reinstallation labor. Your ten-year cost: $400-800 plus significant maintenance time.
Rotting wood also creates safety hazards. Splinters. Structural failure. Potential injury.
Metal raised beds: Galvanized steel costs $200-400 upfront. They don't require maintenance because they're rust and corrosion-resistant. They don't contaminate soil over time. Your ten-year cost: $200-400 with zero maintenance.
GFRC raised beds: Our glass fiber reinforced concrete beds cost $300-500 upfront. They're immune to freeze-thaw cycles. Four times stronger than regular concrete with 12,500 psi compressive strength. Flexural strength over 2,000 psi. They've been tested for over three years in real-world conditions.
Your ten-year cost: $300-500 with zero maintenance, zero replacement, zero contamination concerns.
The math shifts dramatically when you account for time.
Initial preparation of a raised bed takes many hours of hard work. But in later years, you simply turn over the top few inches and plant. This is much easier than tilling and re-creating a large traditional garden every spring.
The rewards come with healthier, more productive crops and less time spent weeding.
High-quality materials that last 50+ years mean you set up once and garden for decades. No disposal. No reinstallation. No contamination concerns as materials break down.
The cheapest option upfront becomes the most expensive option over time.
What This Means for Your Garden
You can buy any raised bed and grow vegetables.
But if you want a garden that produces abundantly with minimal maintenance for the next ten years, you need to get the setup right.
Orient your beds north-south to maximize sun exposure for every plant, every season.
Invest in proper soil composition with quality compost and the right ratios. This is where your real investment goes.
Install drip irrigation from the start if you plan to scale beyond two beds. The water savings and time savings compound over years.
Plan spacing for sustainable maintenance. Four-foot-wide beds with 24-36 inch pathways. Make daily care easy, and you'll actually do it.
Choose materials that last. Calculate ten-year costs, not just upfront costs. Durability saves money and eliminates the hassle of replacement.
These decisions take more planning upfront. They require larger initial investment in some cases.
But they transform your garden from a maintenance burden into a productive system that improves with age.
The raised bed you choose matters less than how you set it up. Get the fundamentals right, and your garden will reward you for decades.
That's what I've learned designing, engineering, and installing raised garden systems since 2019. The products that work best are the ones that make good gardening practices easier to maintain.
Your garden deserves that kind of foundation.